If You Feel Led To Launch Your Own Blog You Have Come to the Right Place!
Perhaps you feel like you have been called to write, or maybe you’ve had a love for the written word as long as you can remember. Regardless of your why, you are now considering starting a blog of your own and I’m excited for you!
It wasn’t so long ago that I felt that prompting within my own spirit to do more. I knew that I had to put myself out there in a vulnerable way so that I could share my faith. What better way than a blog? Writing was not something that I felt that I was particularly talented in. It has been more like a gift presented to me. It was something handed to me so that I could use it to glorify God.
Fast forward to today, I’m now a Christian Writer who has the divine pleasure of helping others to grow in their faith and take a step towards living out their own purpose. I cannot begin to tell you how many emails I get asking how to go about starting a blog.
So if you’re reading this it probably means that you’re ready to get started. I’m happy to walk you through the initial steps to beginning your own blog. I suggest that you bookmark this page so you can refer back to it if need be.

Start With a Blog Plan
DISCLOSURE: THIS POST CONTAINS AFFILIATE LINKS, WHICH MEANS I GET A COMMISSION IF YOU DECIDE TO MAKE A PURCHASE THROUGH MY LINKS, AT NO COST TO YOU. PLEASE READ MY DISCLOSURE FOR MORE INFO.
Whether you are writing for the Lord or you have a different topic in mind, your beginning will resemble those who are also starting out in their blogging journey. After all, we all have to start somewhere. However, there are things that you can do that will help you stand out.
You are going to want to decide what platform you would like to use to create your blog. There are a few to choose from. I’m going to be walking you through how to get started the way I did, but only after I explain how I would do things today. Believe it or not, I actually started off on the wrong platform and created a huge headache for myself. I would like to spare you from that.
Grab yourself a notebook and a pen because this will be your initial blogger binder. You will need a place to store your ideas and your passwords.
You will need to define your why so you can create a strategy for success.
Choose Your Topic
Create an outline of what your blog will be about. Brainstorm and jot down ideas you have for blog posts. Toss around ideas of a blog name and write down several titles that speak to you. Think of a domain name that you would like for your blog. Do you want a .com, .org, .net?
You will also want to decide what kind of format you will be adhering to. Will you be addressing a problem, or creating a type of memoir? Do you plan on educating others? These are all things to think about and decide before you take the plunge.
Set a Goal for Publishing
You are going to want to set a goal for when you would like your blog to go live. Sure, you can hit publish without a plan but I have tried doing it both ways. What I mean is that shortly after I launched my blog, I realized I had been too hasty and skipped doing some valuable research. I’ll get into that more in a minute. Believe me when I say that you don’t want to create more work for yourself.
Take the time to write several posts and publish them within your blog. You can keep them hidden by installing a countdown plug-in. You may be wondering what that is. A plug-in is a component that enables customization within your blog. There is a catch though, plug-ins are only available on WordPress.org and there are thousands of them.
When you finally do launch your blog you will have a few blog posts ready for your readers and you may even have some posts as back up. That’s setting yourself up for a strong start in my opinion!
Create Excitement
If I could do it all over again, I would have created excitement for the launch of my blog. After having a name set and an idea of how I’d like things to look (a brand for my blog), I would have created an Instagram profile and a Facebook page specifically for my blog. Then, I would have created a countdown to the launch of my site and kept it at least a month out. This is a fantastic way to get your blog name out in the writing community and familiarize yourself with other bloggers.
A Warning About Blogging Platforms
The first time I hit publish on my blog I made a choice to start out on the Blogger platform. Blogger was free and user friendly. Honestly, investing in a self-hosted platform intimidated me so I made the “safe” choice. That safe choice ended up being the wrong choice.
I quickly learned that my blog was not only limited in design capabilities but that I actually didn’t own it. Blogger owned it. This made me very uncomfortable. That meant that since Blogger owned my site that they could shut it down anytime that they wanted and I wouldn’t be able to retrieve my content.
After one month with Blogger, I made the decision to transfer my blog to WordPress.org with the help of BlueHost. Please don’t confuse this with WordPress.com. Although they have the same name, WordPress.com is also a free platform and you will run into the same problem of not owning your own site.
When I set-up my transfer to WordPress I took the liberty of using that time to create excitement for a relaunch via Instagram. It sent a good amount of readers to my site the day it went live and I was also able to build my email list by giving an option of a notification email on launch day. I learned a thing or two with that second launch. I’m sharing that bit of info with you and hopefully it will help you with your own blog launch.
Today I’m going to be walking you through the step-by-step process of setting up your hosting with BlueHost which will allow you to get your blog started on WordPress.org. I’m still with BlueHost to this day and have had a great experience with them so far. Anytime I’ve needed help I was able to reach them easily and get answers without delay.
Not only that, but they have the most competitive prices around. You can get your blog running affordably as they offer terrific deals for blog hosting. That’s a win win in my book!
When you have a plan in place you are ready to begin
Get Your Blog Started
As the name suggests, a self-hosted site consists of three things. Hosting, a domain name, and the WordPress.org platform. Go ahead and click through to the >>BlueHost site to begin set up of your blog<<
Set Up Your Hosting
First things first, you will need to click on the WordPress tab in the menu bar at the top of the page. Starting here will ensure that you can continue with a one-click set-up on WordPress. What a cinch!

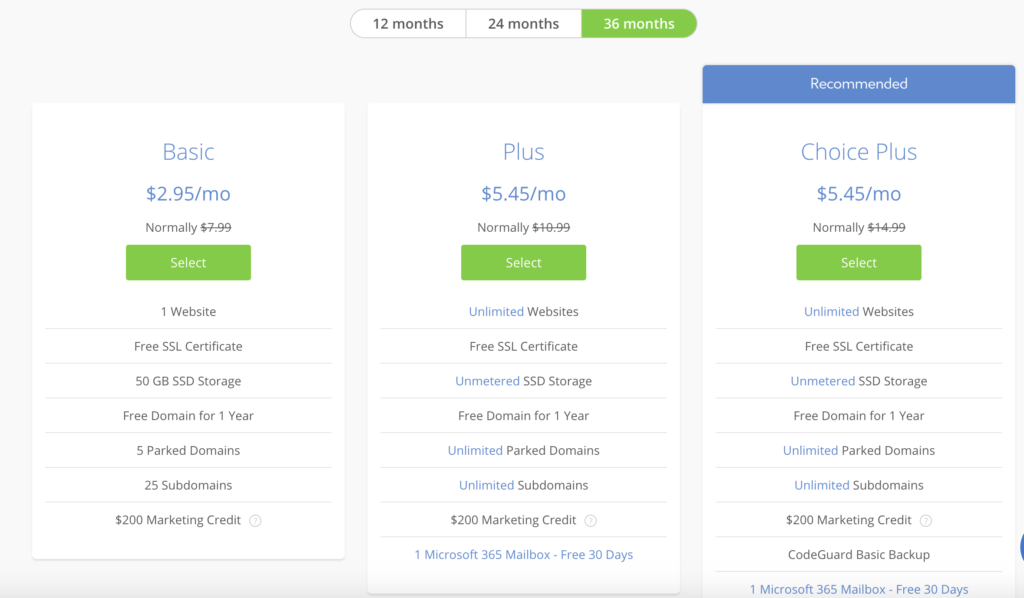
Next, you’ll need to decide what pricing structure works best for you. You can purchase annual billing or you can pay for two or three years at a time to save you money. The three year plan will save you the most.
Each choice comes with a free domain name and SSL certificate for a year. That takes away half the stress!

Choose a Domain Name

You are going to want to choose a domain name. Remember at the beginning of this post I asked you to jot down some ideas? Now is the time to see if those domain names are available. If the domain name is already taken, you can try tweaking your wording a bit.
Try playing with the wording. Instead of spelling out entire words you can use abbreviations. You can also add numbers. Just make sure the domain name isn’t too long and that it is memorable.
BlueHost will even offer up some suggestions if you are feeling stuck. I think that is super helpful.
What if you already have a domain name purchased through another provider like GoDaddy? No need to worry. Call BlueHost and they will walk you through the set up with the domain you already own. There are also countless YouTube videos that will help you through the process.
Extra Options
BlueHost offers extra options for your hosting. I personally opted for the domain privacy option but there are also many others to choose from. Select the ones that you think will be the most useful.
Enter Your Payment
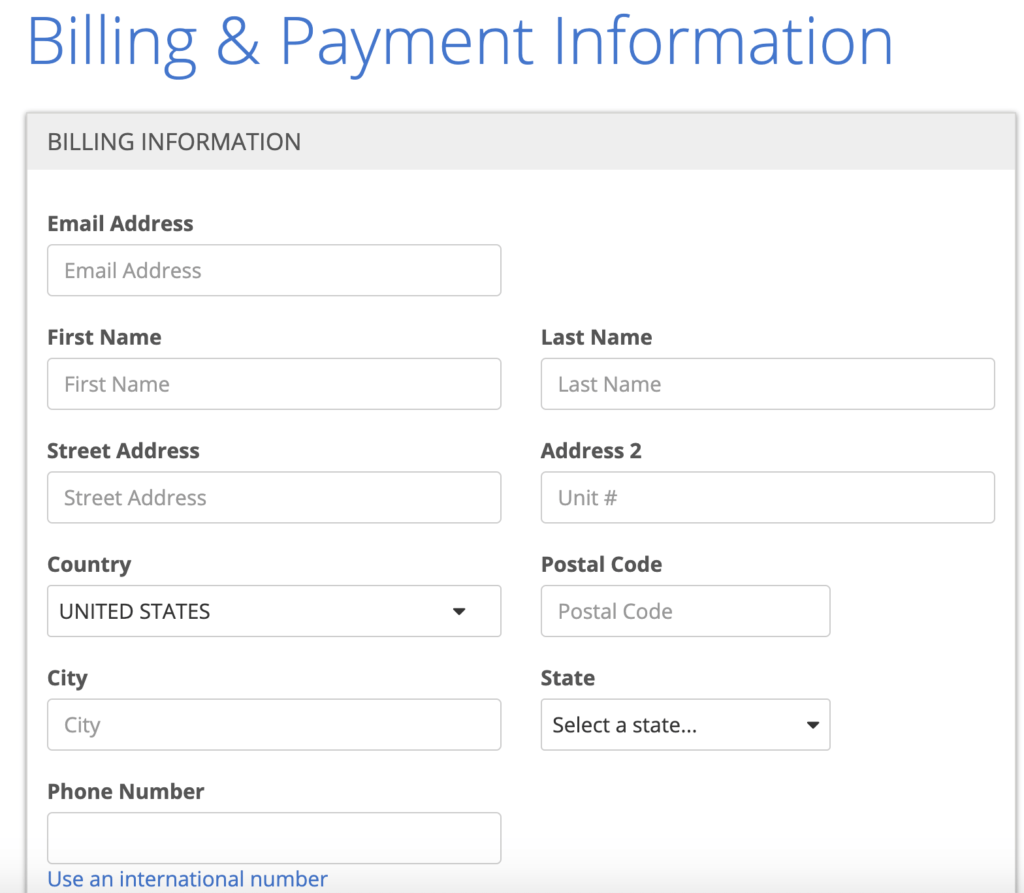
Once you are happy with the plan you selected and the price is where you want it, you are ready to pay. Go ahead and enter your payment info into the secure payment section.
Make sure you take the time you read the fine print and understand how the billing works before you proceed.
Once you are finished filling out the form, check the agreement box and hit submit.

You Are Nearly There
After you complete your Bluehost purchase, you’ll choose a password, answer questions about the nature of your blog, etc.
After that, it will be time for you to choose a free blog theme template. This is basically the framework of how your blog will be appear to your readers. You don’t have to put too much thought into this unless you plan on keeping the free version. However, I HIGHLY suggest you purchase a theme for a polished, professional look.
Purchase a Beautiful Theme
Why You Need a Theme
There are a few benefits to purchasing a theme. Some of them are:
- Choosing a theme that helps deliver the message you are trying to convey by creating a functional and inviting atmosphere.
- Your blog will look more streamlined and sleek.
- Installation directions that will walk you through the process.
- Many themes are customizable, although I recommend choosing a theme that closely resembles the look you are trying to achieve.
- Many themes have developers who are available for trouble-shooting.
One of my favorite places to shop for blog themes and templates is Creative Market. Their online shop has a variety of themes, stock photos, fonts, and templates to choose from. Not only that, but the Market adheres to a lovely aesthetic which transfers through to your blog.
What to Look Out For
You are going to want to create a list of must haves for your blog theme and check the theme descriptions to make sure they meet your standards. Things to look out for are:
- Mobile responsiveness – This is imperative. Most of your readers will most likely be accessing your site on their mobile phones. You want to make sure your blog theme looks good on mobile.
- Make sure the theme is customizable in case you want to change colors or fonts.
- A user-friendly layout with good functionality.
- Displays for social media buttons and having an Instagram feed option is a big plus right now.
Here are some beautiful blog themes you may like from Creative Market…
Powered by Creative Market
If you like the look of my blog theme then I recommend that you pop on over to 17th Avenue Designs. They not only have gorgeous designs but their themes come with a long list of detailed instructions on how to install within your blog. I’m so pleased with how my blog has turned out.
Your Blog is Ready for Your Message
If you have gone through each of these steps then you are well on your way to establishing a successful blog. There were several things that helped me to grow my Christian Blog considerably over the past four years. I go over five of those steps in a blog post I recently published.
If you’d like to read more about my blogging journey then I suggest you check out these posts here…
- 5 Roadblocks That Christian Bloggers Face
- Stepping Into God’s Calling On Your Life
- 6 Tips for the Blogging Beginner
Be blessed in your blogging journey,
Natalie


Leave a Reply